Seiko SARB033 watch

I received this watch as a surprise birthday gift two years from my best friend, and it’s high time I gave it a personal review! I had been drooling over it for quite some time after seeing it first on the Urban Gentry YouTube channel. Somehow Max figured this out (perhaps because I like talking about watches!) and gave it to me out of nowhere.

The SARB033 is right at that that convergence point of price and value I’m always looking for. On paper, the watch is stacked: stainless steel case and bracelet, sapphire crystal, exhibition case back, 6R15 automatic movement with hacking and hand-winding, 50 hour power reserve, and water resistant to 100m. On the wrist, the SARB has a nice weight and wears very comfortably. In terms of design, the watch is just beautiful. The case has gorgeous curved lines and alternates between polished and brushed surfaces. The dial is a glossy black with polished indexes. But the retail price was around $350, well under any Swiss piece with similar specs. The watch has now been discontinued by Seiko after having been in production for almost 20 years, and the retail prices on the remaining watches have shot up. Seiko’s new line-up sees the 6R15 movement only being included in watches more than double the SARB’s price, so it seems to me Seiko figured out that they were giving away too much with the SARB!

The accuracy has been excellent, reliably coming in at +7-8 second per day. This means I reset the time about once a week or so. Since the movement is hacking (when you pull the crown all the way out, the second stops moving), the watch can be set precisely by stopping the seconds hand at the 12, setting the minutes hand to the next minute, and pushing the crown in when the seconds reach zero.

My collection has grown quite a lot over the last few years as I try out different styles of watches, but the Seiko SARB033 has a place at the top of the list. It has become my regular work day watch. I hope to wear it for a very long time to come, and any time I wear it, my appreciation for such a kind, generous, and thoughtful gift is renewed.

Baking Electronics 101: oven reflow on a TV logic board

A while back, Mae got a used 32″ LCD tv for her birthday from our friend Max. I mounted it on the wall in the work-out area of the garage and we both use it to watch tv while working out.

A couple days ago, I was working in the garage for a few hours and had the tv on in the background, and I didn’t notice when but at some point the screen went black. The sound continued working fine, which is probably why I didn’t notice it.

I spent a while fiddling with it, turning it on and off, checking the inputs, changing channels, etc. The sound kept working fine, but no display, although I realized that there was a gray haze that came over the screen when I turned the power on. That led me to believe that the backlight was still working, but something wrong with the video processing.

I hit my friend Max up. He had told me a while back that he used to fix busted tvs (in fact I think he had fixed this one up), so I asked what I should do next on it. He told me to examine the logic board and look for a bad capacitor.

I took down the tv from its wall mount and removed the back. Examining the components on the board, I couldn’t find any that looked damaged or burned out.

Max then reminded me of the oven reflow trick. He had used this to successfully bring a Macbook back to life… for a while. The idea is that over time, due to heat and other conditions, one of the solder points degrades and eventually fails to conduct. Heating up the board can reflow the remaining solder and restore the connection. At this point, I had nothing to lose…. if the reflow trick didn’t work, I would just throw the tv away and buy a new one, so it was worth a try.

I unscrewed the board and removed the connections, then placed the board on a cookie sheet covered in aluminum foil.

I’d like to say I used some mathematical formula to arrive at how hot the oven should be and for how long the board should be in the oven….but I winged it. I set the oven to 375F and once it pre-heated, I put the board in and left it for about 8 minutes or so. This was just long enough to get a good whiff of plastic heating up. I took out the board and let it cool for about 15 minutes.

I didn’t have a ton of hope that the tv would work again, but I had come this far, so I put the board back in place and replaced the connections. I powered the tv back on and…. like Lazarus emerging from the tomb, the image sprang to life! The oven reflow had worked!

Which solder point had flaked off? How long will it continue to work? Who knows! Maybe I bought myself another year before I have to replace the tv.

Dockerizing a simple PHP web app

After learning how to download Docker images and run them in containers, I wanted to try my hand at Dockerizing an app myself.

myTinyTodo is a fairly simple PHP web app that uses SQLite for data storage. I have been using myTinyTodo for several years, hosted on a Digital Ocean VPS running on LAMP. My wife and I use it on a regular basis for grocery lists and other shared to-do lists. I knew it should be a good example for Dockerizing an app, and I would then be able to use it myself. It’s also been mentioned a number of times on the /r/selfhosted subreddit, so I know it has other users as well.

This post was helpful in getting started: https://semaphoreci.com/community/tutorials/dockerizing-a-php-application

Preparing the Dockerfile

I followed along the same lines as that tutorial to start by basing my image on the nimmis/apache-php7 image, which would have apache and php installed and configured properly. Ports 80 and 443 were also exposed, and apache was started in the foreground:

FROM nimmis/apache-php7       
MAINTAINER Scott Breakall <scott@breakall.org>
EXPOSE 80
EXPOSE 443
CMD ["/usr/sbin/apache2ctl", "-D", "FOREGROUND"]

Next up, the Dockerfile calls for SQLite to be installed:

 RUN apt update && \       
apt install -y sqlite3 libsqlite3-dev

Now we have apache, php, and sqlite all set up and ready to go.

Next, copy the mytinytodo folder into the apache folder

COPY mytinytodo /var/www/html/html/

myTinyTodo needs write access to the db folder in order to make use of the SQLite database. In addition, clean out the default apache index.html:

RUN chown -R www-data:www-data  /var/www/html/html/db/
RUN rm /var/www/html/html/index.html

GitHub project

Everything described so far is available in this GitHub repo, including myTinyTodo 1.4.3:

https://github.com/breakall/mytinytodo-docker

Building the image

Download the myTinyTodo installation package into the same folder as the Dockerfile, and unzip it to a folder called myTinyTodo.

Execute the following command:

docker build . --tag=mytinytodo 

This will build the image and name is mytinytodo.

user@pc:~/temp/mytinytodo-docker$ docker images
REPOSITORY TAG IMAGE ID CREATED SIZE
mytinytodo latest a1c6238be95f 2 hours ago 550MB

Now that the image is built, run the image as a container:

docker run --name mytinytodo -p 80:80 -p 443:443 -d mytinytodo 

Run docker ps to see the container running:

user@pc:~/temp/mytinytodo-docker$ docker ps
CONTAINER ID IMAGE COMMAND CREATED STATUS PORTS
NAMES
ca9ce3ab2d0f mytinytodo "/usr/sbin/apache2ct…" 2 hours ago Up 2 hours 0.0.0.0:80->80/tcp, 0.0.0.0:443->443/tcp

Complete setup in the browser

Open the app in the browser to see it running:

I haven’t scripted the database setup since it’s incorporated into the first run of the app anyway, so click the setup.php link.

Click the SQLite radio button, then click Next.

Click Install.

Execute the following to remove the setup.php script:

docker exec mytinytodo rm /var/www/html/html/setup.php 

Reload the main URL:

Success!

Future improvements

SQLite setup

The database setup could be scripted as part of the build process so that the app runs 100% out of the box upon running.

MySQL setup

Since this build is focused on using SQLite, MySQL is not installed at all. If MySQL was desired, the ideal setup would be to have one container to run the PHP app in, and another container to run MySQL in. This could be accomplished by creating two images, and using Docker Compose to orchestrate the creation of two containers that would work together.

Update: the info above is already out of date since I got a couple of buddies to test it out for me, and they had some nice suggestions for improvement in the form of pull requests, which I have merged in (thanks Michael and Max!). But I think the post still holds up to show my process of Dockerizing this simple php app.

SNK809 Milspec Mod

From WWII on, the US government wrote specifications for wrist watches to be worn by pilots and soldiers. Great American companies like Hamilton, Elgin, Waltham, and Benrus made mechanical watches at scale for decades to be supplied to GIs.

The following image is from a military specification for a field watch from the early 60s:

https://i0.wp.com/wornandwound.com/library/uploads/2013/09/MilSpec-Dial.jpg?resize=388%2C378

Hamilton and others continue to make mechanical watches that follow this spec, but I don’t have the budget at the moment to buy one of those. So I decided to do a watch mod project aimed at producing a milspec watch.

The Seiko SKX is the watch with the most options in terms of available crystals, hands, bezels, etc. for modding, but at around $200 it’s pricey to get started on. Starting as low as $55, the SNK presents the cheapest way to get a decent mechanical with a fair number of mod options — so that’s where I decided to start.

Continue reading “SNK809 Milspec Mod”

Orient Flight

Since I got this watch a couple years ago, I’ve only grown to appreciate this watch more and more, and one aspect I love in particular is the legibility. This watch is so easy to read in bright light, low light, and anywhere in between. And in the dark, the lume is bright and lasts all night—it’s on the hands, minutes, and hour indices. At 42mm this watch is about as large as I want to wear on my wrist, and it’s very comfortable on a NATO.

Infrared Blaster

This project was about allowing me to turn the bedroom tv on and off via voice control. I already had an Amazon Echo Dot in the bedroom, so I had a way to capture intent. What I needed was a way to turn that intent into an infrared signal that the tv would receive as a power on/off command.

ESP8266/NodeMCU proves to be useful yet again as a cheap, low-power wifi module that can interface to analog devices, such as LED receiver and emitter.

I found this absolutely fantastic project on Github called ESP8266-HTTP-IR-Blaster which provides a ton of useful functionality, such as sending and receiving infrared signals, as well as a handy web interface for viewing codes and showing system info.

Since the software sketch was so full featured, this project would really be more of an exercise with getting the hardware working, and finished into a reasonably durable device.

The first step was to acquire the electronics, and get them working in a breadboard.

Continue reading “Infrared Blaster”

Kiddo Blaster

The goal of this project was to replace the simple stand-alone MP3 player I used to play a playlist of soothing music in my daughter’s room at bedtime… with a remote controlled MP3 player that could play storybook MP3s as well as the good night music playlist.

I already had a couple of infrared remotes from a strip of LED lights that quit working–I needed a way to receive an IR remote’s commands, and trigger MP3s to play. I also had a small “Class-T” audio amplifier and speakers ready to plug into.

After googling around a little, I found this project on github that had a sketch for an Arduino to control an MP3 player. I bought this YX5300 MP3 player off Amazon for $8.

Continue reading “Kiddo Blaster”

Helping Puerto Rico with amateur radio

How my uncle Jim Breakall WA3FET used amateur radio to help Puerto Rico after Hurricane Maria:

“Breakall listened and took notes as Vazquez reported the damage to Arecibo, so he could report out to the many scientists the status of the telescope. But he and other ham radio users worked relentlessly to contact family and friends of those at the observatory and in the neighboring communities to report back that their loved ones were okay.

Jim Breakall

Continue reading “Helping Puerto Rico with amateur radio”

Greylisting

Years ago when I first registered breakall.org, I used the now defunct Microsoft Custom Domains to manage the domain and receive email at scott@breakall.org. This involved creating an MX record for breakall.org pointed to a Microsoft IP address. Later when I decided to build my own email server, I created a new top priority MX record for breakall.org pointed at my own server, but I left the Microsoft MX record as a secondary. Functionally this meant that for the last four years, outlook.com has been a safety net for email that might be lost if it was sent to my email server at a time when my server was down for any reason. Overall, I’ve had pretty good uptime, but there have been a few… incidents along the way that caused it to be down for a while. So I would occasionally check the Microsoft inbox to see if any emails had fallen into the safety net, and there was rarely anything in there.

Another key element to this story is that in the continuous fight against spam, I learned about and enabled greylisting on my primary server. Greylisting works by responding to an initial contact from an external SMTP server with a 451 message: “Recipient address rejected: Greylisting in effect, please come back later”. Normally, the sending SMTP server will just wait about 10 minutes, then try again, at which point, the message will be processed normally. This cuts down on a lot of spam because malicious email servers don’t typically bother to try again. (A side effect is that incoming mail can be delayed while the external server waits to retry.)

In the last month, I’ve been noticing more emails slipping into the Microsoft inbox. I hadn’t had any issues with uptime on my own email server (that I knew of anyway), and I was receiving a normal amount of email in the primary inbox, so I began to investigate.

Continue reading “Greylisting”

Tuning my 20m / 40m fan dipole

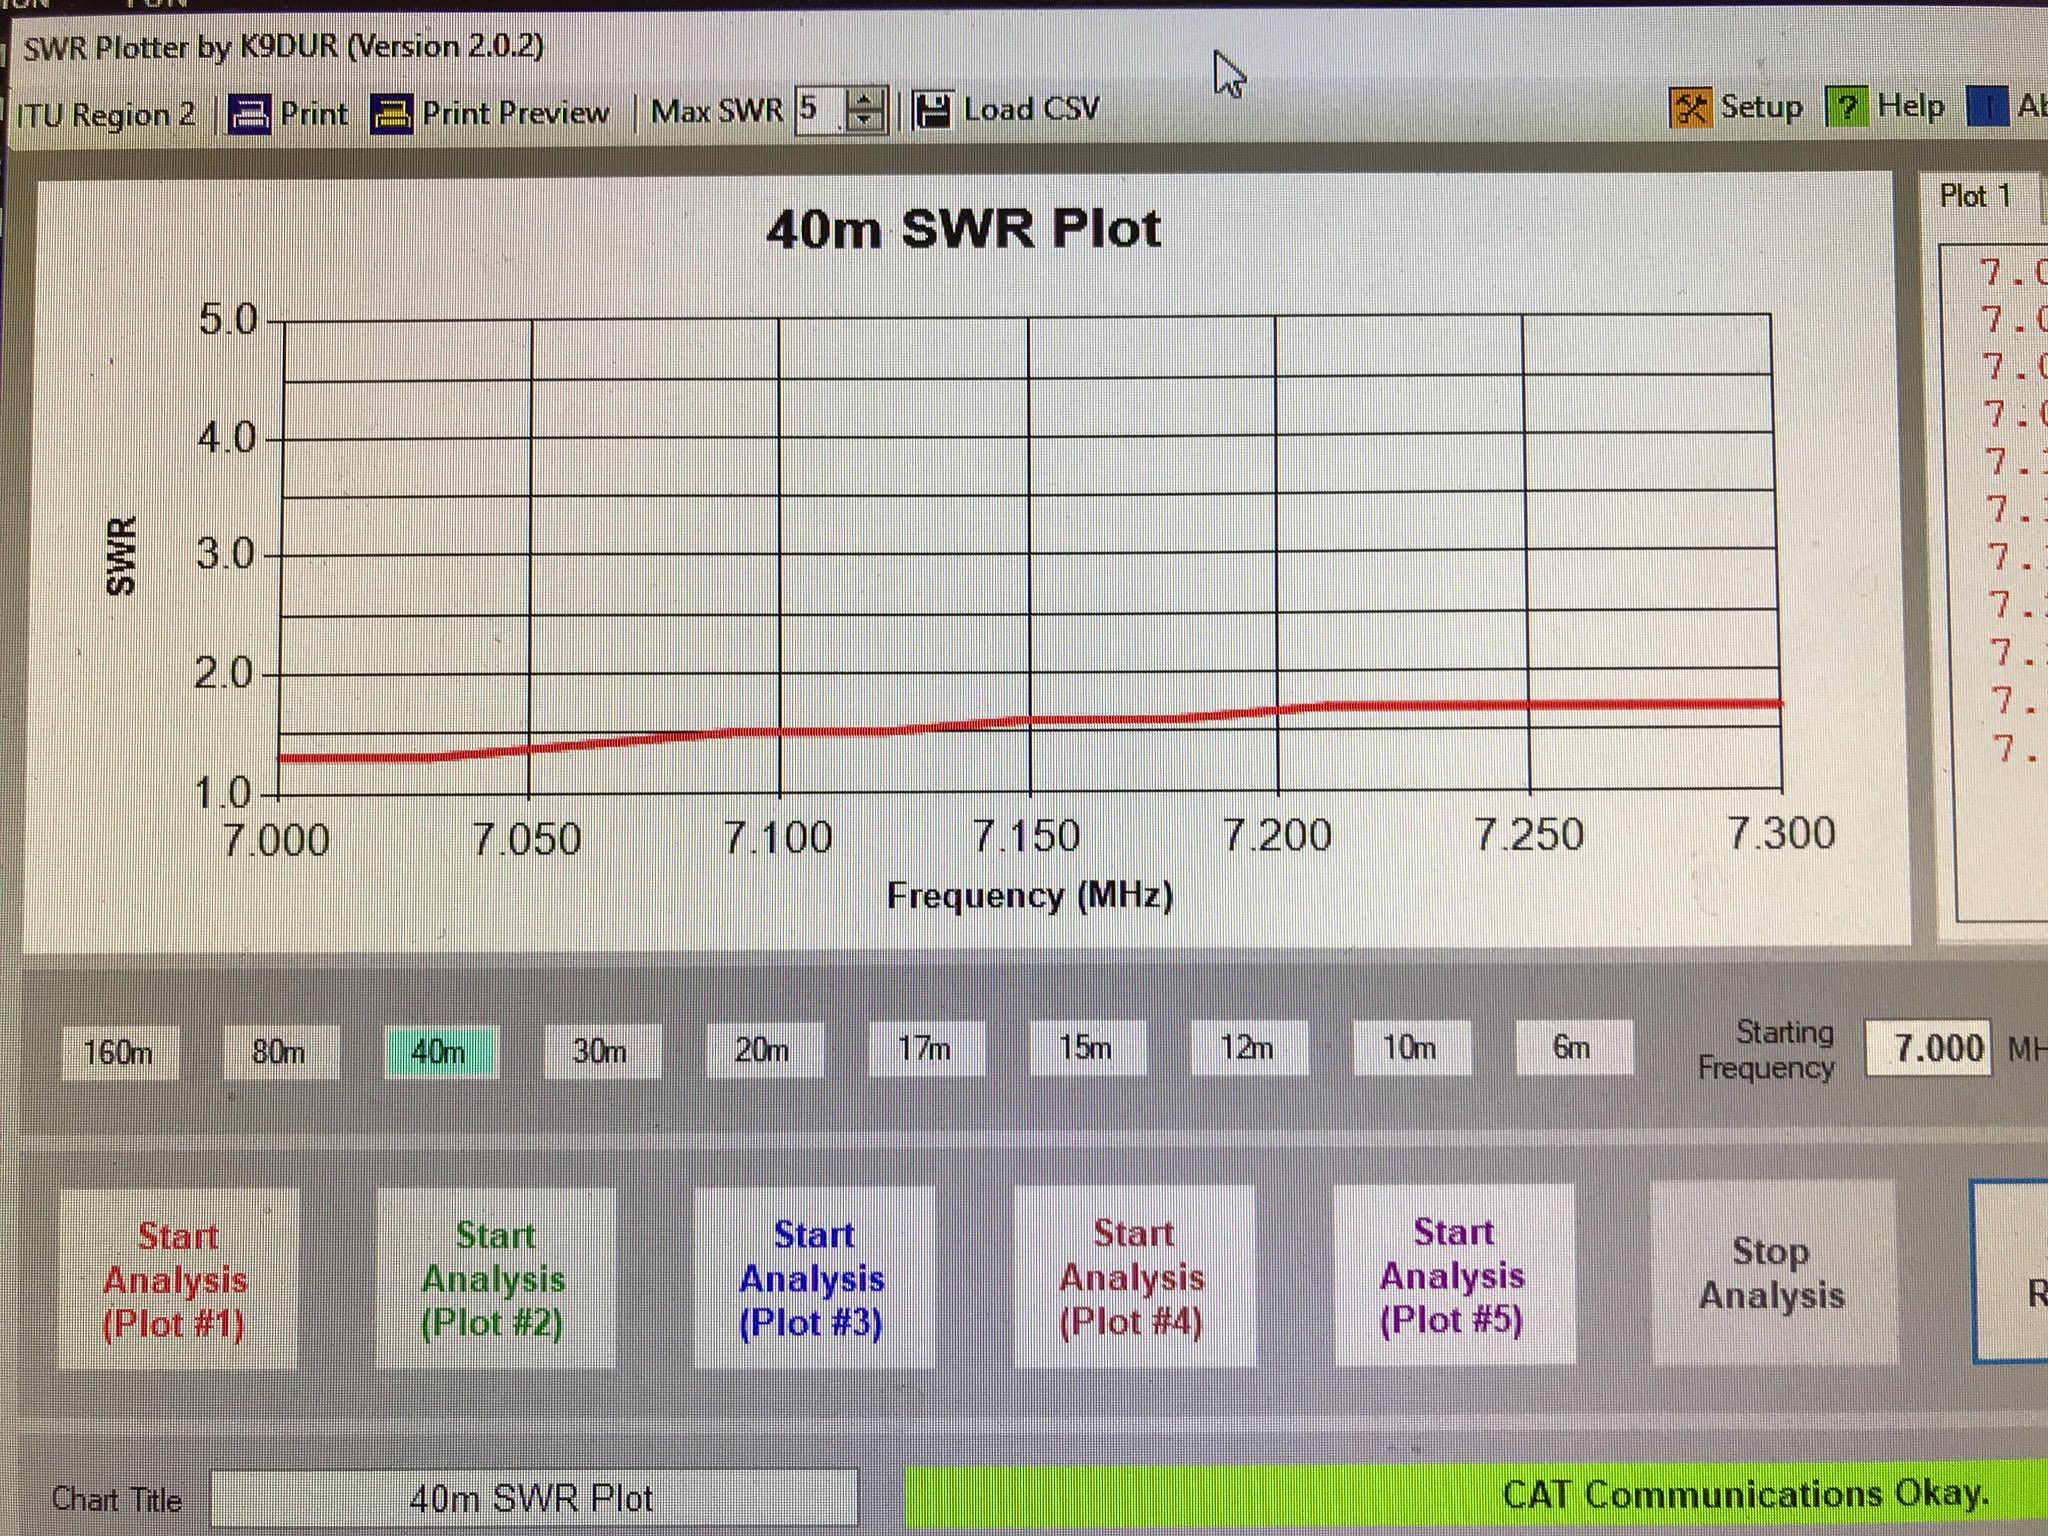
This spring I constructed a 20/40m fan dipole and hung it up in the my backyard. I cut the lengths of each element according to the standard formula (234 / design frequency = each dipole side length in feet), and left some extra on each side for tuning. SWR was under 2:1 for both 20m and 40m, but there was definitely room to improve. Today I was able to spend some time taking measurements and tuning the antenna.

I used the excellent SWR Plotter program by K9DUR that automatically transmits across a selected band and records the SWR measured by my Flex 5000a radio.

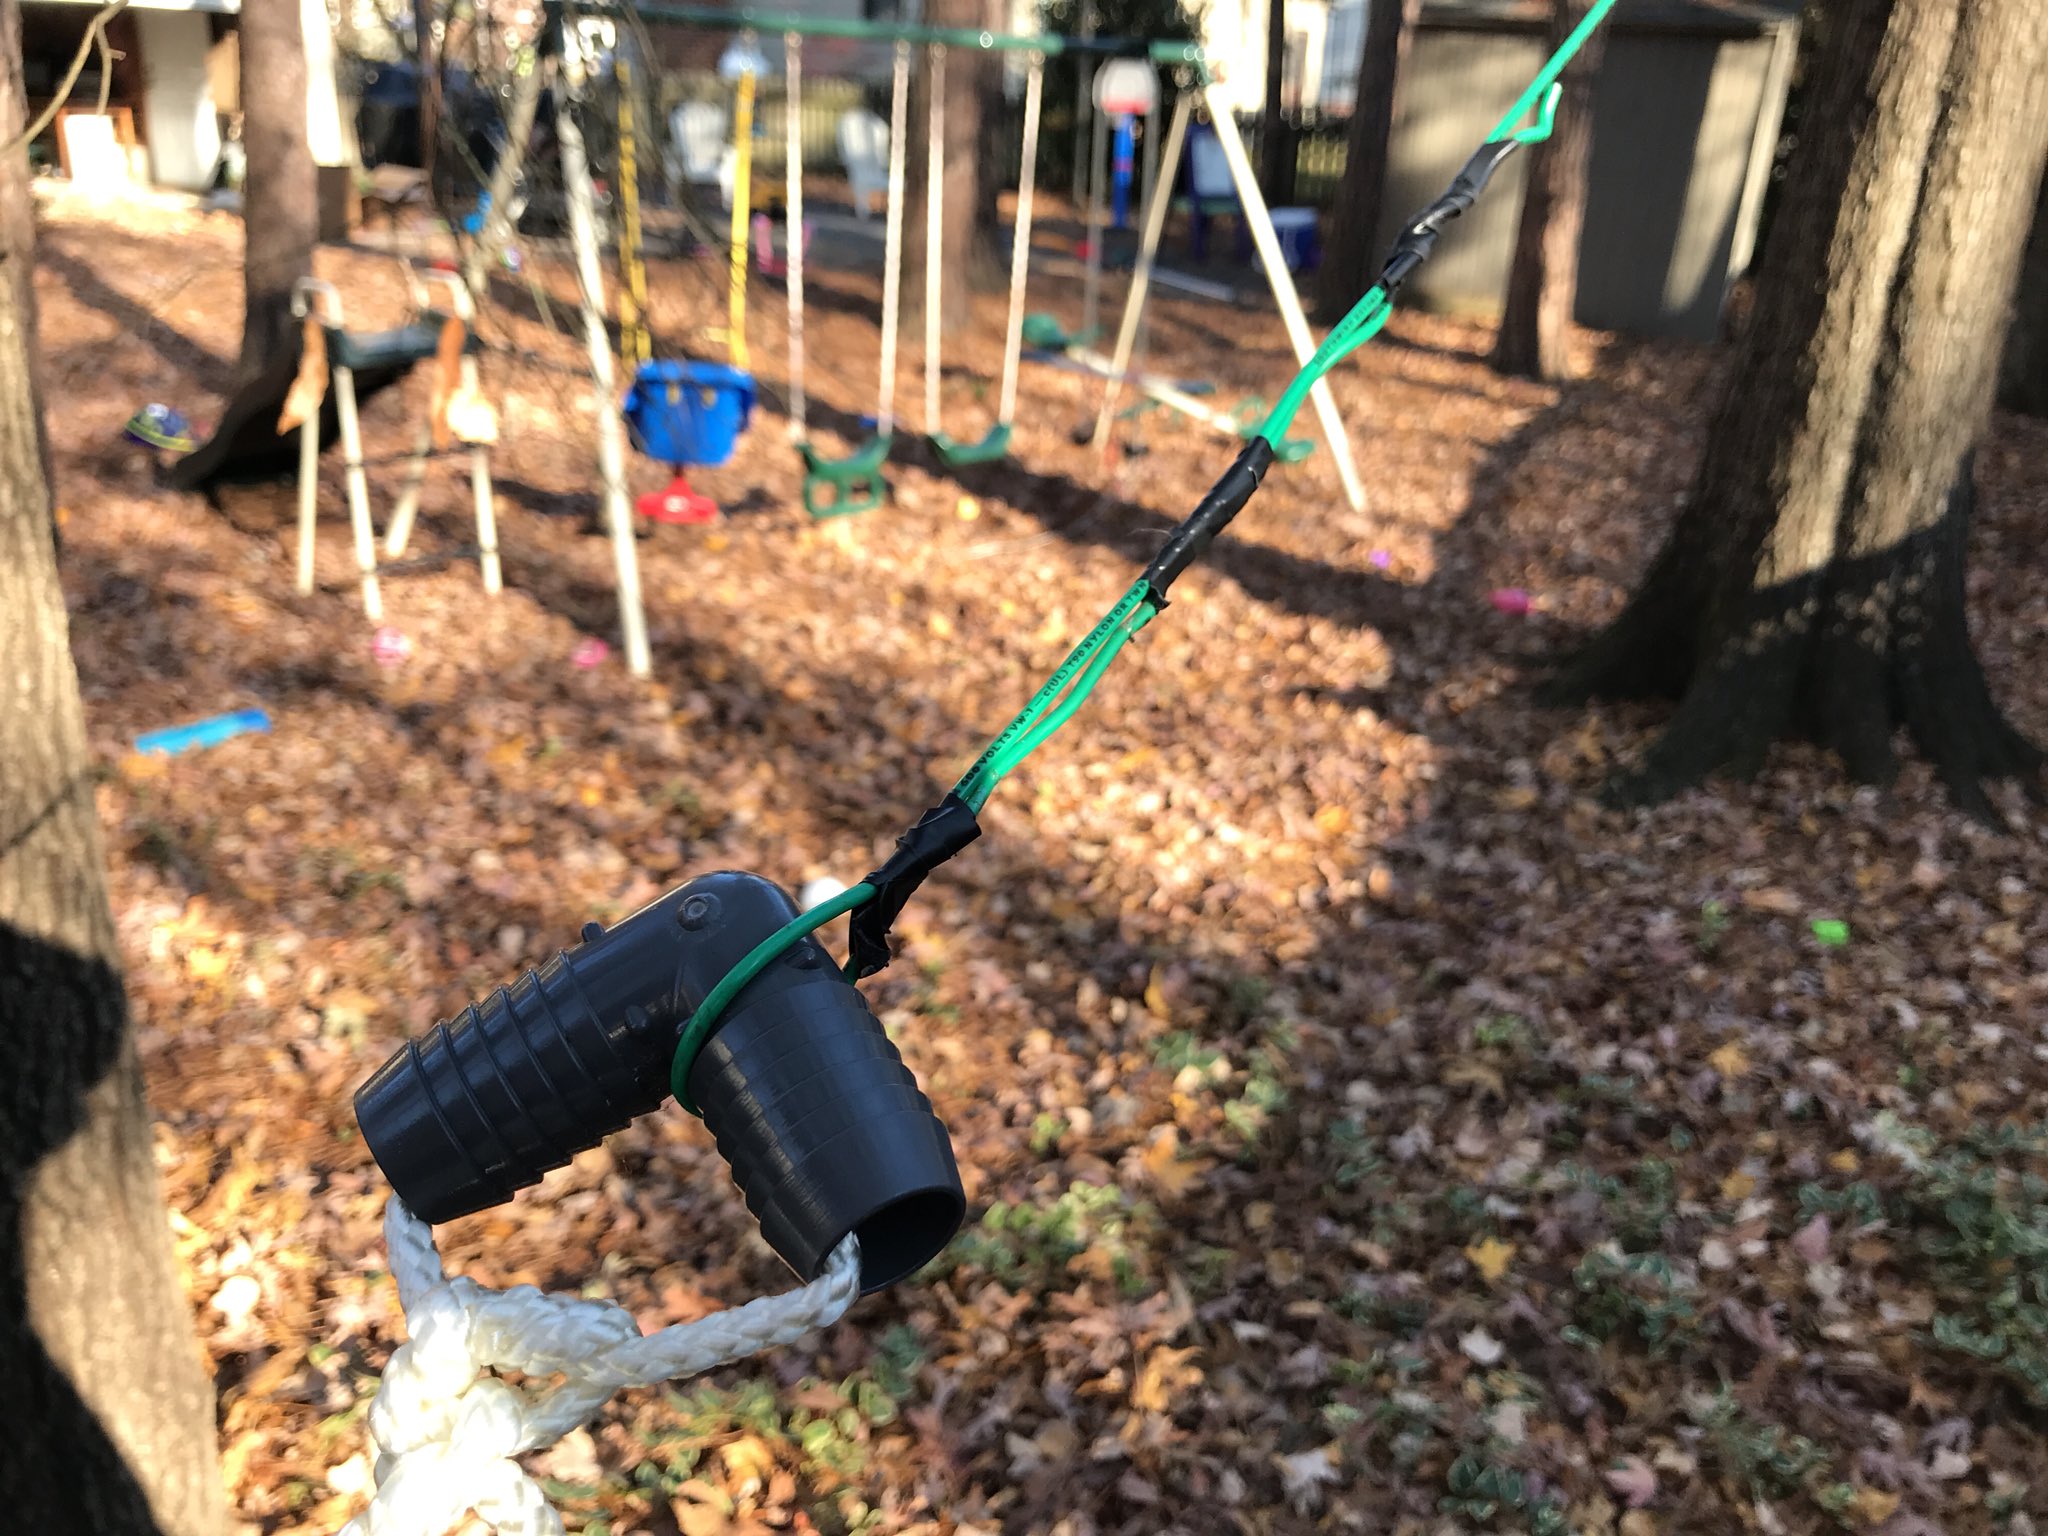
After the initial measurements showed that the 40m element of the fan dipole was tuned too low, I folded back about 6” on either side.

Continue reading “Tuning my 20m / 40m fan dipole”